Build a Grails 3 application with the Vaadin 8 Framework
Learn how to build a Grails 3 application with the Vaadin 8 Framework
Authors: Ben Rhine
Grails Version: 3.3.1
1 Grails Training
Grails Training - Developed and delivered by the folks who created and actively maintain the Grails framework!.
2 Getting Started
In this guide you are going to build a Grails 3 application with the Vaadin 8 Framework.
2.1 What you will need
To complete this guide, you will need the following:
-
Some time on your hands
-
A decent text editor or IDE
-
JDK 1.7 or greater installed with
JAVA_HOMEconfigured appropriately
2.2 How to complete the guide
To get started do the following:
-
Download and unzip the source
or
-
Clone the Git repository:
git clone https://github.com/grails-guides/vaadin-grails.git
The Grails guides repositories contain two folders:
-
initialInitial project. Often a simple Grails app with some additional code to give you a head-start. -
completeA completed example. It is the result of working through the steps presented by the guide and applying those changes to theinitialfolder.
To complete the guide, go to the initial folder
-
cdintograils-guides/vaadin-grails/initial
and follow the instructions in the next sections.
You can go right to the completed example if you cd into grails-guides/vaadin-grails/complete
|
2.3 Vaadin 8 Grails 3 Profile
The initial directory of this project was created with the command
grails create-app demo --profile me.przepiora.vaadin-grails:web-vaadin8:0.3We supply to the create-app command the Vaadin 8 Grails 3 Profile's coordinates.
With the use of application profiles, Grails allows you to build modern web applications. There are profiles to facilitate the construction of REST APIs or Web applications with a Javascript front-end (Angular, REACT) or Vaadin apps.
3 About Vaadin
Vaadin is Java Web UI Framework for Business Applications.
With Vaadin Framework, you’ll use a familiar component based approach to build awesome single page web apps faster than with any other UI framework. Forget complex web technologies and just use Java or any other JVM language. Only a browser is needed to access your application - no plugins required.

| The Vaadin 8 Grails profile allows you mix Vaadin endpoints and traditional Grails endpoints. |
On the one hand, we are going to have endpoints which will be handled by Grails Controllers. They will render HTML, JSON or XML using GSP or Grails Views.
On the other hand, we are going to have Vaadin endpoints. We will develop the UI using Java or Groovy, and we will connect to the Grails service layer directly.
If you require additional information on Vaadin, please check out the official documentation here. Additionally, you may find a fair number of examples in an older version of Vaadin, and this page gives a good explanation of how some of these features have been updated in Vaadin 8.
4 Running the Application
At this point a test run is suggested just to make sure everything is functioning properly.
To run the application first
$ cd initial/To launch the application, run the following command.
$ ./gradlew bootRunIf everything is good to go this will start up the Grails application,
which will be running on http://localhost:8080

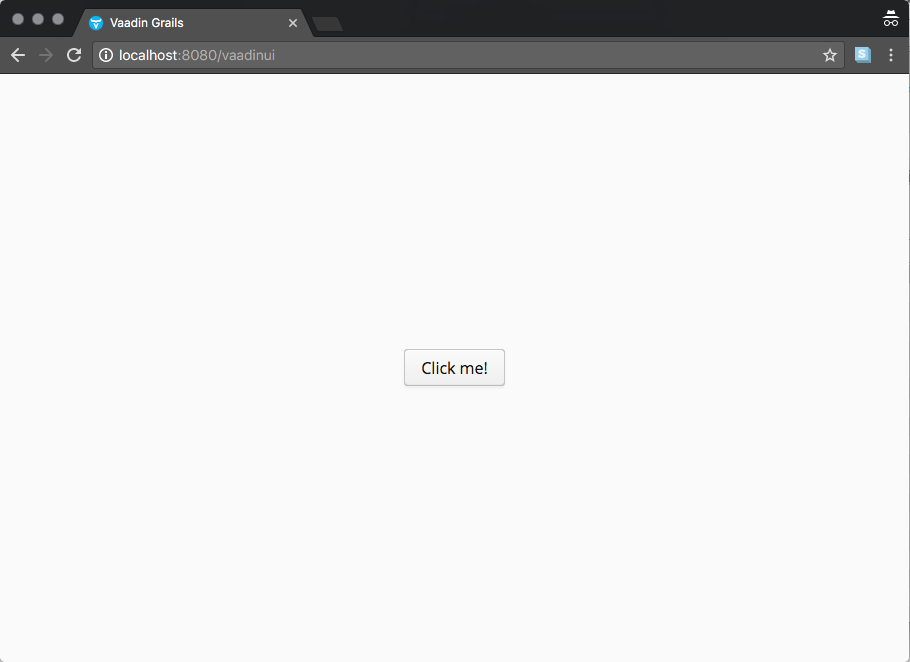
To see Vaadin in action navigate to http://localhost:8080/vaadinUI instead.

5 Writing the Application
5.1 Creating the domain
Lets start by creating our domain model for the application.
  $ grails create-domain-class demo.Driver
  $ grails create-domain-class demo.Make
  $ grails create-domain-class demo.Model
  $ grails create-domain-class demo.User
  $ grails create-domain-class demo.Vehicle
Now let’s edit our domain classes under grails-app/domain/demo/. We’ll add some properties and the three following annotations.
-
@GrailsCompileStatic- Code that is marked withGrailsCompileStaticwill all be statically compiled except for Grails specific interactions that cannot be statically compiled but that GrailsCompileStatic can identify as permissible for dynamic dispatch. These include things like invoking dynamic finders and DSL code in configuration blocks like constraints and mapping closures in domain classes. -
@EqualsAndHashCode- Auto generates equals and hashCode methods -
@ToString- Auto generates toString method
package demo

import grails.compiler.GrailsCompileStatic
import groovy.transform.EqualsAndHashCode
import groovy.transform.ToString

@GrailsCompileStatic
@EqualsAndHashCode(includes=['name'])
@ToString(includes=['name'], includeNames=true, includePackage=false)
class Make {

    String name

    static constraints = {
            name nullable: false
    }
}package demo
import grails.compiler.GrailsCompileStatic
import groovy.transform.EqualsAndHashCode
import groovy.transform.ToString
@GrailsCompileStatic
@EqualsAndHashCode(includes=['name'])
@ToString(includes=['name'], includeNames=true, includePackage=false)
class Model {
String name
static constraints = {
name nullable: false
}
}package demo
import grails.compiler.GrailsCompileStatic
import groovy.transform.EqualsAndHashCode
import groovy.transform.ToString
@GrailsCompileStatic
@EqualsAndHashCode(includes=['name', 'make', 'model'])
@ToString(includes=['name', 'make', 'model'], includeNames=true, includePackage=false)
class Vehicle {
String name
Make make
Model model
static belongsTo = [driver: Driver]
static mapping = {
name nullable: false
}
static constraints = {
}
}There is a bit more to our Driver.groovy than meets the eye versus the first 3 classes. That’s
because we are actually extending our User.groovy class with driver. This will grant us
some extra flexibility in the future as we grow our application.
package demo

import grails.compiler.GrailsCompileStatic
import groovy.transform.EqualsAndHashCode
import groovy.transform.ToString

@GrailsCompileStatic
@EqualsAndHashCode(includes=['name'])
@ToString(includes=['name'], includeNames=true, includePackage=false)
class Driver extends User {

    String name

    static hasMany = [ vehicles: Vehicle ]

    static constraints = {
        vehicles nullable: true
    }
}package demo
import groovy.transform.EqualsAndHashCode
import groovy.transform.ToString
import grails.compiler.GrailsCompileStatic
@GrailsCompileStatic
@EqualsAndHashCode(includes='username')
@ToString(includes='username', includeNames=true, includePackage=false)
class User implements Serializable {
private static final long serialVersionUID = 1
String username
String password
boolean enabled = true
boolean accountExpired
boolean accountLocked
boolean passwordExpired
static constraints = {
password nullable: false, blank: false, password: true
username nullable: false, blank: false, unique: true
}
static mapping = {
password column: '`password`'
}
}5.2 Bootstrap Data
Now that our domain is in place, lets preload some data to work with.
package demo

import groovy.util.logging.Slf4j

@Slf4j
class BootStrap {

    def init = { servletContext ->
        log.info "Loading database..."
        final driver1 = new Driver(name: "Susan", username: "susan", password: "password1").save()
        final driver2 = new Driver(name: "Pedro", username:  "pedro", password: "password2").save()

        final nissan = new Make(name: "Nissan").save()
        final ford = new Make(name: "Ford").save()

        final titan = new Model(name: "Titan").save()
        final leaf = new Model(name: "Leaf").save()
        final windstar = new Model(name: "Windstar").save()

        new Vehicle(name: "Pickup", driver: driver1, make: nissan, model: titan).save()
        new Vehicle(name: "Economy", driver: driver1, make: nissan, model: leaf).save()
        new Vehicle(name: "Minivan", driver: driver2, make: ford, model: windstar).save()
    }
    def destroy = {
    }
}
5.3 Creating the service layer
Next lets create our service layer for our application so Grails and Vaadin can share resources.
  $ grails create-service demo.DriverService
  $ grails create-service demo.MakeService
  $ grails create-service demo.ModelService
  $ grails create-service demo.VehicleService
Now let’s edit our service classes under grails-app/services/demo/.
We’ll add a listAll() method to all of the classes. This method will have the following additional annotation.
-
@ReadOnly- good practice to have on methods that only return data
package demo

import grails.gorm.transactions.ReadOnly
import groovy.transform.CompileStatic

@CompileStatic
@ReadOnly
class DriverService {

    @ReadOnly
    List<Driver> listAll() {
        Driver.where { }.list()
    }
}package demo
import grails.gorm.transactions.ReadOnly
import groovy.transform.CompileStatic
@CompileStatic
class MakeService {
@ReadOnly
List<Make> listAll() {
Make.where { }.list()
}
}package demo
import grails.gorm.transactions.ReadOnly
import groovy.transform.CompileStatic
@CompileStatic
class ModelService {
@ReadOnly
List<Model> listAll() {
Model.where { }.list()
}
}Our VehicleService.groovy has an additional save() method so that we can add new data to our application.
package demo

import grails.gorm.transactions.ReadOnly
import groovy.transform.CompileStatic

@CompileStatic
@ReadOnly
class VehicleService {

    def save(final Vehicle vehicle) {
        vehicle.save(failOnError: true)
    }

    @ReadOnly
    List<Vehicle> listAll(boolean lazyFetch = true) {
        if ( !lazyFetch ) {
            return Vehicle.where {}
                    .join('make')
                    .join('model')
                    .join('driver')
                    .list()
        }
        Vehicle.where { }.list()
    }
}
5.4 Creating a controller
While completely unnecessary for Vaadin we want to demonstrate that there is no conflict between Grails controllers and the Vaadin Framework.
$ grails create-controller demo.GarageControllerNow let’s edit our controller under grails-app/controllers/demo/. We will import one of our services, update our index method, and add the following annotation.
-
@GrailsCompileStatic- Code that is marked withGrailsCompileStaticwill all be statically compiled except for Grails specific interactions that cannot be statically compiled but that GrailsCompileStatic can identify as permissible for dynamic dispatch. These include things like invoking dynamic finders and DSL code in configuration blocks like constraints and mapping closures in domain classes.
package demo

import grails.converters.JSON
import groovy.transform.CompileStatic

@CompileStatic
class GarageController {

    VehicleService vehicleService (1)

    def index() { (2)
        final List<Vehicle> vehicleList = vehicleService.listAll()

        render vehicleList as JSON
    }
}| 1 | Declaring our service |
| 2 | index() calls our service and renders the output as JSON |
At this point lets make sure everything is working properly and run [runningTheApp] the application.
Now we can exercise the API using cURL or another API tool.
Make a GET request to /garage to get a list of Vehicles:
  $ curl -X "GET" "http://localhost:8080/garage"

    [{"id":1,"driver":{"id":1},"make":{"id":1},"model":{"id":1},"name":"Pickup"},
     {"id":2,"driver":{"id":1},"make":{"id":1},"model":{"id":2},"name":"Economy"},
     {"id":3,"driver":{"id":2},"make":{"id":2},"model":{"id":3},"name":"Minivan"}]
If data comes back everything is setup and connected properly at this point and we have verified that we have some test data. Now lets look at how to attach Vaadin to Grails
5.5 Vaadin
Finally time to start adding Vaadin code to our application!
Consider src/main/groovy/demo/DemoGrailsUI.groovy to be your Vaadin
controller / dispatcher as it will help you understand the Vaadin flow. Our init()
method is the applications entry point to Vaadin itself, this is your top level view
essentially. From here you can setup navigation and other whole app view components.
Our DemoGrailsUI.groovy as it currently is, is great for a
single page web application but its not the most flexible if we want to add navigation
components or other pages later on. With this in mind we are going to make it a bit more
flexible using views. Using views is also beneficial in helping keep our Vaadin frontend
well organized.
| For more information on views and navigation with Vaadin look here. |
package demo

import com.vaadin.annotations.Title
import com.vaadin.navigator.View
import com.vaadin.navigator.ViewDisplay
import com.vaadin.server.VaadinRequest
import com.vaadin.annotations.Theme
import com.vaadin.spring.annotation.SpringUI
import com.vaadin.spring.annotation.SpringViewDisplay
import com.vaadin.ui.Component
import com.vaadin.ui.Label
import com.vaadin.ui.Panel
import com.vaadin.ui.UI
import com.vaadin.ui.VerticalLayout
import groovy.transform.CompileStatic

@CompileStatic
@SpringUI(path="/vaadinUI")
@Title("Vaadin Grails") (1)
@SpringViewDisplay (2)
class DemoGrailsUI extends UI implements ViewDisplay { (3)
    private Panel springViewDisplay (4)

    /** Where a line is matters, it can change the position of an element. */
    @Override
    protected void init(VaadinRequest request) { (5)
        final VerticalLayout root = new VerticalLayout()
        root.setSizeFull()
        setContent(root)
        springViewDisplay = new Panel()
        springViewDisplay.setSizeFull()

        root.addComponent(buildHeader())
        root.addComponent(springViewDisplay)
        root.setExpandRatio(springViewDisplay, 1.0f)
    }

    static private Label buildHeader() { (6)
        final Label mainTitle = new Label("Welcome to the Garage")
        mainTitle
    }

    @Override
    void showView(final View view) { (7)
        springViewDisplay.setContent((Component) view)
    }
}| 1 | We add the @Title annotation to give our window / tab a nice name |
| 2 | Add @SpringViewDisplay so we can use views |
| 3 | Along with and implements ViewDisplay to our class |
| 4 | Next create an additional panel for our UI |
| 5 | Initial entry point into our Vaadin View |
| 6 | Helper method for building our header |
| 7 | Additional function required for using views; dynamically controls setting our view components |
| The order in which you add components to the layout, can determin their position within the layout. |
init() can get quite large quite fast so it is best to break out UI components
into their own methods like buildHeader() to keep your files clear and concise.
|
5.6 Adding your view
Now to add the view which is the bulk of our Vaadin code. Create a new file located in
src/main/groovy/demo called GarageView.groovy.
Next make the necessary updates.
package demo

import com.vaadin.data.HasValue
import com.vaadin.data.ValueProvider
import com.vaadin.event.selection.SelectionEvent
import com.vaadin.event.selection.SelectionListener
import com.vaadin.event.selection.SingleSelectionEvent
import com.vaadin.event.selection.SingleSelectionListener
import com.vaadin.navigator.View
import com.vaadin.navigator.ViewChangeListener
import com.vaadin.spring.annotation.SpringView
import com.vaadin.ui.Button
import com.vaadin.ui.ComboBox
import com.vaadin.ui.Grid
import com.vaadin.ui.HorizontalLayout
import com.vaadin.ui.ItemCaptionGenerator
import com.vaadin.ui.Label
import com.vaadin.ui.TextField
import com.vaadin.ui.VerticalLayout
import groovy.util.logging.Slf4j
import org.springframework.beans.factory.annotation.Autowired
import javax.annotation.PostConstruct
import groovy.transform.CompileStatic

@Slf4j
@CompileStatic
@SpringView(name = GarageView.VIEW_NAME) (1)
class GarageView extends VerticalLayout implements View { (2)
    public static final String VIEW_NAME = "" (3)

    @Autowired  (4)
    private DriverService driverService

    @Autowired
    private MakeService makeService

    @Autowired

    private ModelService modelService

    @Autowired
    private VehicleService vehicleService

    private Vehicle vehicle = new Vehicle()

    @PostConstruct (5)
    void init() {
        /** Display Row One: (Add panel title) */
        final HorizontalLayout titleRow = new HorizontalLayout()
        titleRow.setWidth("100%")
        addComponent(titleRow)

        final Label title = new Label("Add a Vehicle:")
        titleRow.addComponent(title)
        titleRow.setExpandRatio(title, 1.0f) // Expand

        /** Display Row Two: (Build data input) */
        final HorizontalLayout inputRow = new HorizontalLayout()
        inputRow.setWidth("100%")
        addComponent(inputRow)

        // Build data input constructs
        final TextField vehicleName = this.buildNewVehicleName()
        final ComboBox<Make> vehicleMake = this.buildMakeComponent()
        final ComboBox<Model> vehicleModel = this.buildModelComponent()
        final ComboBox<Driver> vehicleDriver = this.buildDriverComponent()
        final Button submitBtn = this.buildSubmitButton()

        // Add listeners to capture data change
        //tag::listeners[]
        vehicleName.addValueChangeListener(new UpdateVehicleValueChangeListener('NAME'))
        vehicleMake.addSelectionListener(new UpdateVehicleComboBoxSelectionLister('MAKE'))
        vehicleModel.addSelectionListener(new UpdateVehicleComboBoxSelectionLister('MODEL'))
        vehicleDriver.addSelectionListener(new UpdateVehicleComboBoxSelectionLister('DRIVER'))
        submitBtn.addClickListener { event ->
            this.submit()
        }
        //end::listeners[]

        // Add data constructs to row
        [vehicleName, vehicleMake, vehicleModel, vehicleDriver, submitBtn].each {
            inputRow.addComponent(it)
        }

        /** Display Row Three: (Display all vehicles in database) */
        final HorizontalLayout dataDisplayRow = new HorizontalLayout()
        dataDisplayRow.setWidth("100%")
        addComponent(dataDisplayRow)
        dataDisplayRow.addComponent(this.buildVehicleComponent())
    }

    class UpdateVehicleValueChangeListener implements HasValue.ValueChangeListener {
        String eventType

        UpdateVehicleValueChangeListener(String eventType) {
            this.eventType = eventType
        }

        @Override
        void valueChange(HasValue.ValueChangeEvent event) {
            updateVehicle(eventType, event.value)
        }
    }
    class UpdateVehicleComboBoxSelectionLister implements SingleSelectionListener {
        String eventType

        UpdateVehicleComboBoxSelectionLister(String eventType) {
            this.eventType = eventType
        }

        @Override
        void selectionChange(SingleSelectionEvent event) {
            updateVehicle(eventType, event.firstSelectedItem)
        }
    }

    @Override
    void enter(ViewChangeListener.ViewChangeEvent event) {
        // This view is constructed in the init() method()
    }

    /** Private UI component builders ------------------------------------------------------------------------------- */
    static private TextField buildNewVehicleName() {
        final TextField vehicleName = new TextField()
        vehicleName.setPlaceholder("Enter a name...")

        vehicleName
    }

    private ComboBox<Make> buildMakeComponent() {
        final List<Make> makes = makeService.listAll()

        final ComboBox<Make> select = new ComboBox<>()
        select.setEmptySelectionAllowed(false)
        select.setPlaceholder("Select a Make")
        select.setItemCaptionGenerator(new CustomItemCaptionGenerator())
        select.setItems(makes)

        select
    }

    class CustomItemCaptionGenerator implements ItemCaptionGenerator {

        @Override
        String apply(Object item) {
            if (item instanceof Make ) {
                return (item as Make).name
            }
            if ( item instanceof Driver ) {
                return (item as Driver).name
            }
            if ( item instanceof Model ) {
                return (item as Model).name
            }
            null
        }
    }

    private ComboBox<Model> buildModelComponent() {
        final List<Model> models = modelService.listAll()

        final ComboBox<Model> select = new ComboBox<>()
        select.setEmptySelectionAllowed(false)
        select.setPlaceholder("Select a Model")
        select.setItemCaptionGenerator(new CustomItemCaptionGenerator())
        select.setItems(models)

        select
    }

    private ComboBox<Driver> buildDriverComponent() {
        final List<Driver> drivers = driverService.listAll()

        final ComboBox<Driver> select = new ComboBox<>()
        select.setEmptySelectionAllowed(false)
        select.setPlaceholder("Select a Driver")
        select.setItemCaptionGenerator(new CustomItemCaptionGenerator())
        select.setItems(drivers)

        select
    }

    private Grid buildVehicleComponent() {
        final List<Vehicle> vehicles = vehicleService.listAll(false) (6)
        final Grid grid = new Grid<>()
        grid.setSizeFull()  // ensures grid fills width
        grid.setItems(vehicles)
        grid.addColumn(new VehicleValueProvider('id')).setCaption("ID")
        grid.addColumn(new VehicleValueProvider('name')).setCaption("Name")
        grid.addColumn(new VehicleValueProvider('make.name')).setCaption("Make")
        grid.addColumn(new VehicleValueProvider('model.name')).setCaption("Model")
        grid.addColumn(new VehicleValueProvider('driver.name')).setCaption("Name")

        grid
    }

    class VehicleValueProvider implements ValueProvider {
        String propertyName

        VehicleValueProvider(String propertyName) {
            this.propertyName = propertyName
        }

        @Override
        Object apply(Object o) {
            switch (propertyName) {
                case 'id':
                    if ( o instanceof Vehicle) {
                        return (o as Vehicle).id
                    }
                    break
                case 'name':
                    if ( o instanceof Vehicle) {
                        return (o as Vehicle).name
                    }
                    break
                case 'model.name':
                    if ( o instanceof Vehicle) {
                        return (o as Vehicle).model.name
                    }
                    break
                case 'make.name':
                    if ( o instanceof Vehicle) {
                        return (o as Vehicle).make.name
                    }
                    break
                case 'driver.name':
                    if ( o instanceof Vehicle) {
                        return (o as Vehicle).driver.name
                    }
                    break

            }
            null
        }
    }

    static private Button buildSubmitButton() {
        final Button submitBtn = new Button("Add to Garage")
        submitBtn.setStyleName("friendly")

        submitBtn
    }

    private updateVehicle(final String eventType, final eventValue) {
        switch (eventType) {
            case 'NAME':
                if ( eventValue instanceof String ) {
                    this.vehicle.name = eventValue as String
                }
                break
            case 'MAKE':
                if ( eventValue instanceof Optional<Make> ) {
                    this.vehicle.make = (eventValue as Optional<Make>).get()
                }
                break
            case 'MODEL':
                if ( eventValue instanceof Optional<Model> ) {
                    this.vehicle.model = (eventValue as Optional<Model>).get()
                }
                break
            case 'DRIVER':
                if ( eventValue instanceof Optional<Driver> ) {
                    this.vehicle.driver = (eventValue as Optional<Driver>).get()
                }
                break
            default:
                log.error 'updateVehicle invoked with wrong eventType: {}', eventType
        }
    }

    private submit() {
        vehicleService.save(this.vehicle)
        // tag::navigateTo[]
        getUI().getNavigator().navigateTo(VIEW_NAME)
        // end::navigateTo[]
    }
}| 1 | Add @SpringView annotation and set the name so that your view can be found. |
| 2 | The view should extend the layout style that is desired |
| 3 | Set the actual view name |
| 4 | Services will not be injected automatically into Vaadin Views. You need to use @Autowired annotation in order to get dependency injection to work properly. |
| 5 | Tells the view init() to execute after the main UI init() |
| 6 | Loads Vehicles and its associations eagerly. |
The usage of eager loading in the vehicleService.listAll(false) warrants further explanation.
When a Vaadin component calls a Grails service, once the service method completes, the Hibernate session is closed which means that any associations not loaded by the query could lead to a LazyInitializationException due to the closed session.
It is therefore critical that your queries always return the data that is required to render the view. This typically leads to better performing queries anyway and will in fact help you design a better performing application.
| Grails auto dependency injection is not able to detect services in Vaadin, thus we require using the more traditional Spring annotation @Autowired in order to get dependency injection to work properly. |
Our view is trying to mimic the layout of much of modern web design by making use of "Rows" in our case we have 3 rows, a header, data collection, and data display (grid). As we develop a pattern start to emerge in Vaadin for views.
-
Create layout
-
Create UI component
-
Add UI component to layout
-
Add layout to view
When adding layout to the view you can just use addComponent() as it is aware that it is
adding to itself, unlike the top level UI where root.addComponent() is required.
To keep a clean file continue building each UI component as its own private method.
Once we have built our UI components now we need to be able to interact with them. To do this
we add listeners to our components making use of groovy closures to specify what would happen
when an event occurs. In our case we are updateVehicle() which we then submit()
vehicleName.addValueChangeListener(new UpdateVehicleValueChangeListener('NAME'))
vehicleMake.addSelectionListener(new UpdateVehicleComboBoxSelectionLister('MAKE'))
vehicleModel.addSelectionListener(new UpdateVehicleComboBoxSelectionLister('MODEL'))
vehicleDriver.addSelectionListener(new UpdateVehicleComboBoxSelectionLister('DRIVER'))
submitBtn.addClickListener { event ->
    this.submit()
}
Using the listeners we build the vehicle object which is then submitted when the button is clicked. The last line of our submit method reloads our view to refresh the newly updated data.
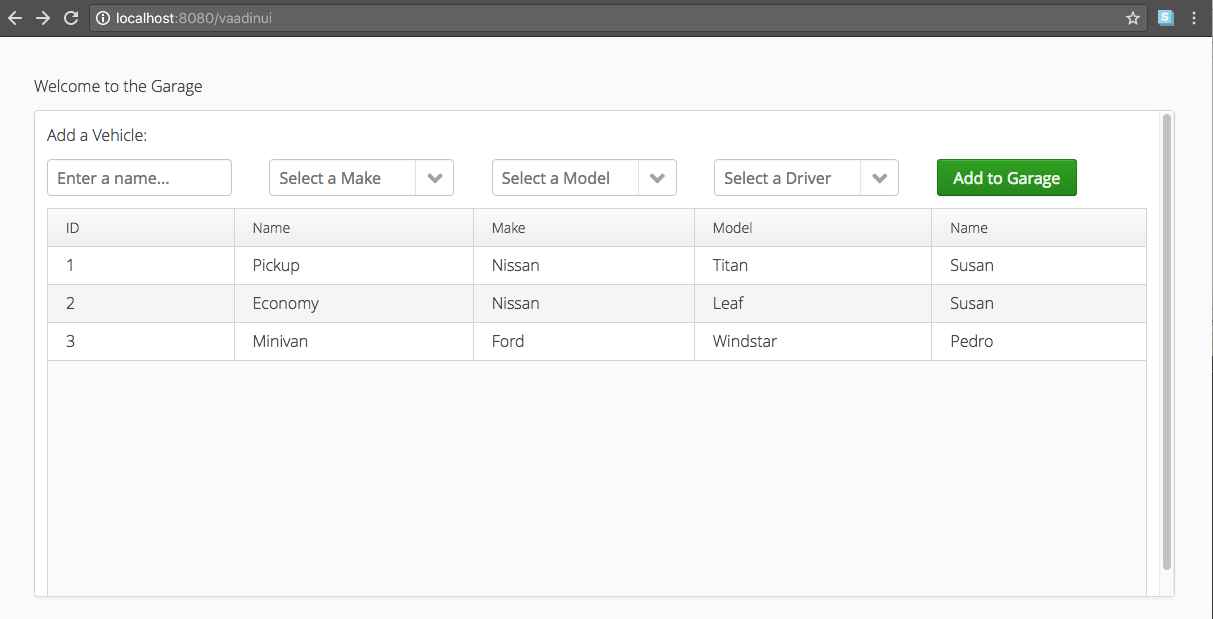
getUI().getNavigator().navigateTo(VIEW_NAME)Now that everything is in place return to [runningTheApp] to run your app. If everything is as it should be you will see the following.

6 Next Steps
There’s plenty of opportunities to expand the scope of this application. Here are a few ideas for improvements you can make on your own:
-
Create a modal dialog form to add new
Driver,Makes&Modelsinstances. Use Vaadin’s Sub-Windows to give you a head start. -
Add support for updates to existing
Vehicleinstances. A modal dialog might work well for this as well, or perhaps an editable table row -
Currently
Make&Modeldomain classes are not related to each other. Adding an association between them, will allow us to display Models for the currently selectedMakein the dropdowns. You will want to make use of the JavaScript Array.filter method. -
Currently, views contain direct references to services. Although it’s completely fine for a demo or a small application, things will tend to get out of hand when our codebase grows. Patterns such as Model-View-Presenter (MVP) may help to keep an organized codebase. You can read more about patterns and Vaadin in the Book of Vaadin
