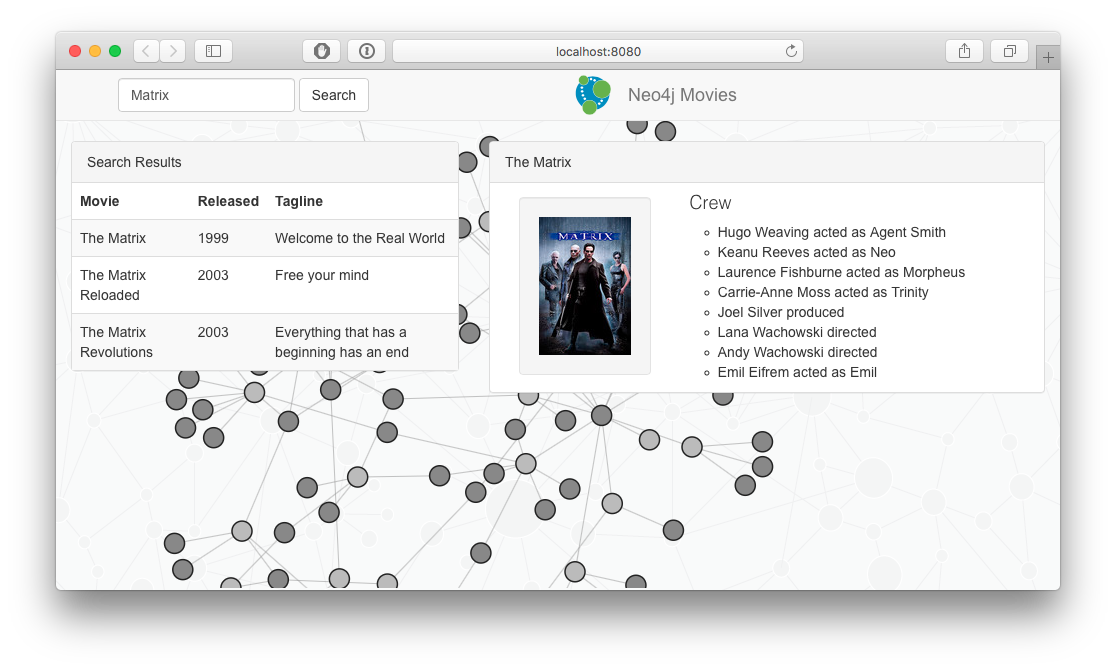
Building a Graph application with Grails and Neo4j
This guide with demonstrate how to build the Neo4j Movies example application with Grails and GORM
Authors: Graeme Rocher
Grails Version: 3.3.0
1 Grails Training
Grails Training - Developed and delivered by the folks who created and actively maintain the Grails framework!.
2 Getting Started
In this guide you are going to learn how to build the Neo4j Movies example application, which is implemented in a variety of languages as the official example application for using Neo4j.
For those unfamiliar with Neo4j, it is a Graph database that optimizes Graph traversal, something that is relatively slow on a traditional relational database.
The goal of GORM for Neo4j is to make it easy to map an existing Groovy domain model with Neo4j nodes and relationships.
2.1 What you will need
To complete this guide, you will need the following:
-
Some time on your hands
-
A decent text editor or IDE
-
JDK 1.7 or greater installed with
JAVA_HOMEconfigured appropriately
You will also need to Download and Install the "Community Edition" of Neo4j.
For the Mac, Neo4j comes as a DMG containing the Neo4j server and can simply be installed directly into your Applications folder:
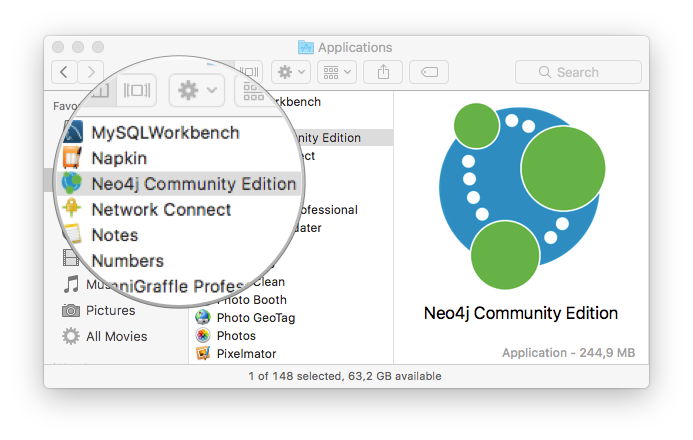
| For Windows the executable installer will install the Neo4j server and make it available from the start menu. For *nix operating systems, you can use the Unix console application. |
Once the Neo4j server application is running specify a data directory and click the "Start" button:
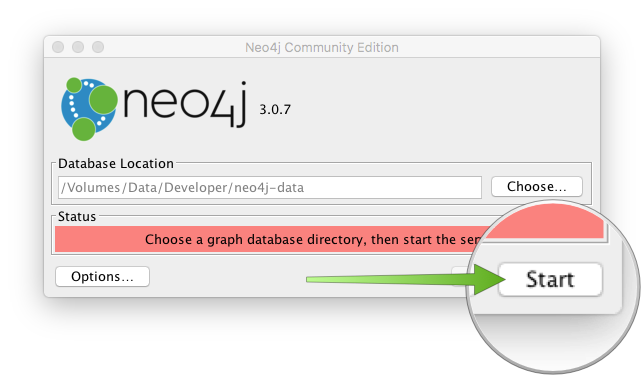
This will start Neo4j on the default port which is 7474, you can now access the Neo4j administrative UI using the link provided by the application:
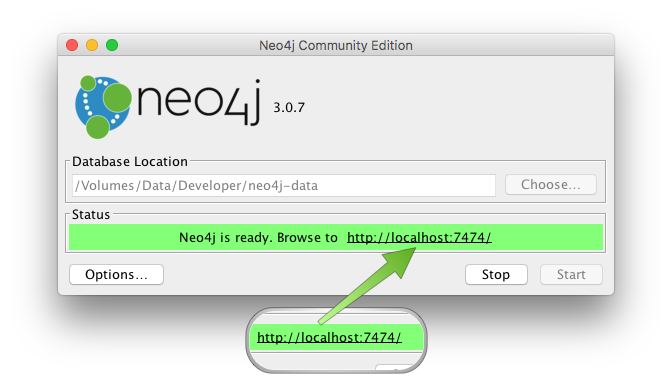
Now you can login to Neo4j with the default username and password, which are neo4j and neo4j:
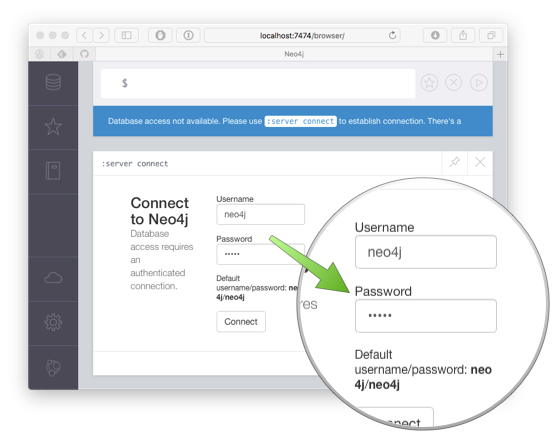
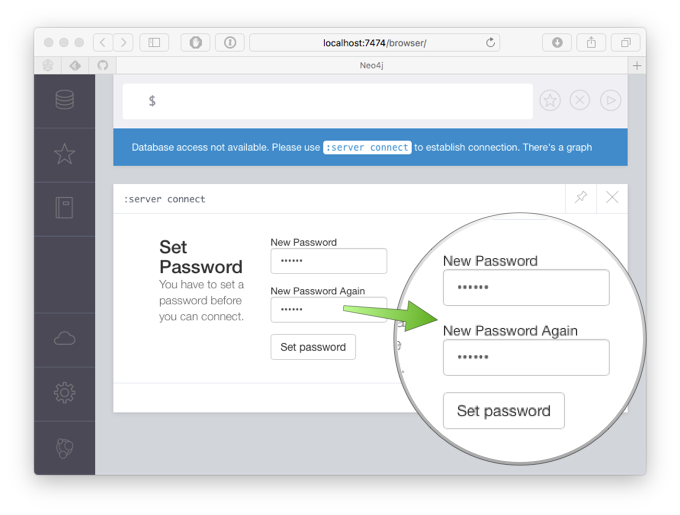
Once you are prompted to login you will be asked to change the password. Change the value to "movies" for this tutorial:
2.2 How to complete the guide
To get started do the following:
-
Download and unzip the source
or
-
Clone the Git repository:
git clone https://github.com/grails-guides/neo4j-movies.git
The Grails guides repositories contain two folders:
-
initialInitial project. Often a simple Grails app with some additional code to give you a head-start. -
completeA completed example. It is the result of working through the steps presented by the guide and applying those changes to theinitialfolder.
To complete the guide, go to the initial folder
-
cdintograils-guides/neo4j-movies/initial
and follow the instructions in the next sections.
You can go right to the completed example if you cd into grails-guides/neo4j-movies/complete
|
3 Populating the Data Model
The first thing to do before we can get going is populate the data model. To do this head over to the Neo4j browser at http://localhost:7474/browser/ and type :play movies:
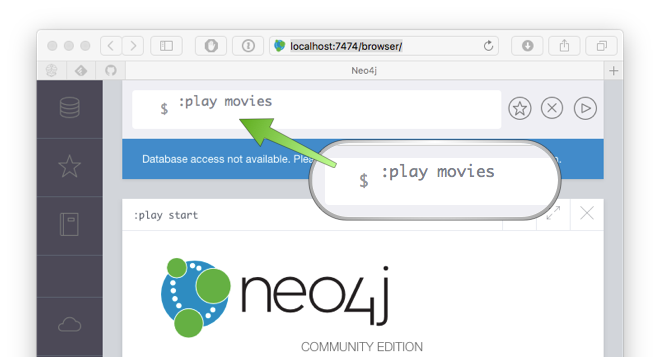
This will bring up a preview of the domain model that represents the movies database represented by a series of Cypher statements CREATE statements.
Cypher is the query language used by Neo4j. The following statement for example creates two new Neo4j nodes in the graph (one that represents a Movie and another that represents a Person):
CREATE (TheMatrix:Movie {title:'The Matrix', released:1999, tagline:'Welcome to the Real World'})
CREATE (Keanu:Person {name:'Keanu Reeves', born:1964})
The value of the left side of the expression TheMatrix:Movie is the name of the node, like a variable name and is not stored in the database.
The value of the right side is the Node label (in this case Movie).
The values within the curly brackets are the node attributes.
The names of the nodes can be used in later statements to create relationships between the nodes:
CREATE (Keanu)-[:ACTED_IN {roles:['Neo']}]->(TheMatrix)The above CREATE statement creates a relationship between the Keanu node and the TheMatrix node. The relationship type is ACTED_IN and like nodes relationships can have attributes (in this case a roles attribute).
Click on the code to populate it into Neo4j browser editor:
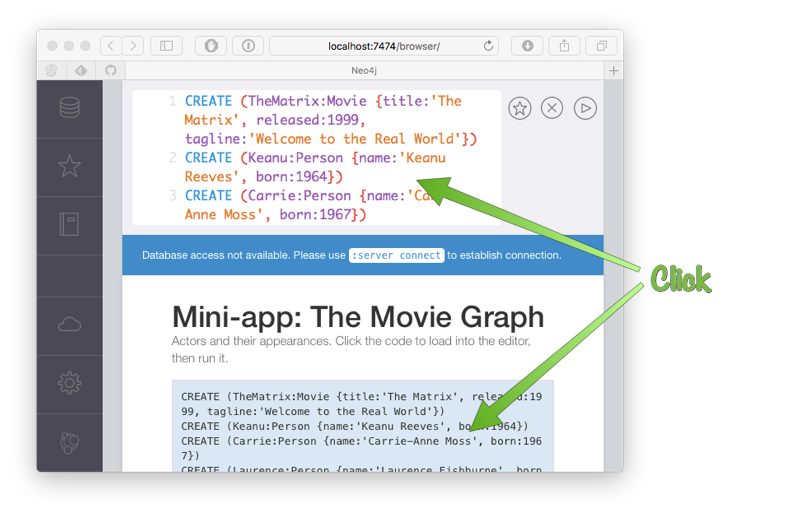
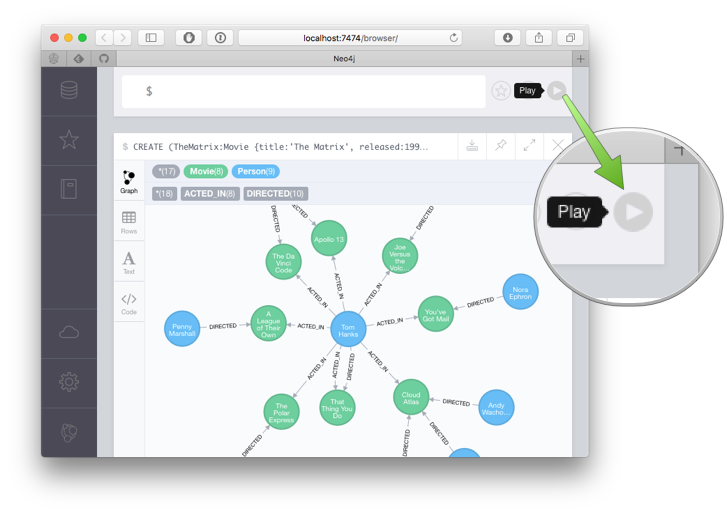
This will place the necessary Cypher statements into the Neo4j browser editor that will populate the example database. You can then press the "Play" button to run the code and in the window below will appear a Graph visualization of the database model:
4 Configure GORM for Neo4j
Firstly, this guide is built with GORM 6.1.6.RELEASE, so in order to complete the guide we must first configure Grails to use GORM 6.1.6.RELEASE.
To do so set the gormVersion property in gradle.properties to 6.1.6.RELEASE:
grailsVersion=3.3.0
gormVersion=6.1.6.RELEASE
neo4jVersion=3.1.2
gradleWrapperVersion=3.5
build.gradle already contains a dependency to neo4j plugin. You will need to modify the neo4j dependency to also use GORM 6.1.6.RELEASE:
compile "org.grails.plugins:neo4j"Now modify the already existing neo4j configuration block within the grails-app/conf/application.yml file. Configure the Neo4j connection settings to use the "movies" password you set earlier:
grails:
    neo4j:
        url: bolt://localhost
        username: "neo4j"
        password: "movies"
5 Writing the Application
As mentioned previously in this guide you are going to implement the Neo4j Movies example application. The Neo4j website describes the example as follows:
It is a simple, one-page webapp, that uses Neo4j’s movie demo database (movie, actor, director) as data set. The same front-end web page in all applications consumes 3 REST endpoints provided by backend implemented in the different programming languages and drivers.
The REST endpoints to be implemented are:
-
single movie listing by title
-
movie search by title
-
graph visualization of the domain
5.1 Define the GORM Domain Model
Now that you have configured GORM correctly, the next step is to define a domain model that maps the Neo4j graph.
To do so we are going to create domain classes to represent the two types of nodes in the domain model. You can use the create-domain-class command of the CLI to do this, or your favourite IDE or text editor:
$ grails create-domain-class neo4j.movies.Person
$ grails create-domain-class neo4j.movies.Movie
In addition, we will create a domain class to model the relationship between the two domain classes called CastMember:
$ grails create-domain-class neo4j.movies.CastMemberNow open up the Person domain class located at grails-app/domain/neo4j/movies/Person.groovy and modify the contents to look like the following:
package neo4j.movies

import grails.compiler.GrailsCompileStatic

/**
 * Models a Person node in the graph database
 */
@GrailsCompileStatic
class Person {
    String name
    int born

    static hasMany = [appearances: CastMember]

    static constraints = {
        name blank:false
        born min:1900
    }
}
As you can see a Person has a name, a year of birth and an association to CastMember (more on that later).
Now open up the Movie domain class located at grails-app/domain/neo4j/movies/Movie.groovy and modify the contents to look like the following:
package neo4j.movies

import grails.compiler.GrailsCompileStatic

/**
 * Models a movie node in the graph database
 */
@GrailsCompileStatic
class Movie {
    String title
    String tagline
    int released

    static hasMany = [cast: CastMember]

    static constraints = {
        released min:1900
        title blank:false
    }
}
A Movie has a title, a tagline, release year and also features an association to CastMember.
The CastMember domain class is going to model the relationship between a Person and a Movie. To do that we are going to use the grails.neo4j.Relationship trait, which allows us to map a domain class to a Neo4j relationship instead of a node:
package neo4j.movies

import grails.neo4j.Relationship
import groovy.transform.CompileStatic

/**
 * Models a relationship between a Person and a Movie
 */
@CompileStatic
class CastMember implements Relationship<Person, Movie> { (1)

    List<String> roles = [] (2)

    CastMember() {
        type = RoleType.ACTED_IN (3)
    }

    static enum RoleType { (4)
        ACTED_IN, DIRECTED
    }
}| 1 | The Relationship trait takes 2 generic arguments. The from entity and the to entity. |
| 2 | Relationship entities can have attributes too, in this case a roles attribute |
| 3 | We set the default relationship type to ACTED_IN |
| 4 | The relationship types are represented by a RoleType enum |
5.2 Implementing the REST Endpoints
As mentioned previously, the REST endpoints to be implemented are:
-
single movie listing by title
-
movie search by title
-
graph visualization of the domain
To implement these various REST endpoints first create a controller called MovieController. You can do so with the grails CLI or via your favourite text editor or IDE by creating a class within the grails-app/controllers/neo4j/movies directory whose name ends with Controller:
$ grails create-controller neo4j.movies.MovieControllerThe initial contents of the controller should look like the following:
@CompileStatic
class MovieController {
    static responseFormats = ['json', 'xml']
   ...
}
To map the various endpoints to the controller add the following to the grails-app/controllers/neo4j/movies/UrlMappings.groovy file:
        "/movie/$title"(controller: 'movie', action: 'show') (1)
        '/search'(controller: 'movie', action: 'search') (2)
'/graph'(controller: 'movie', action: 'graph') (3)| 1 | Maps the /movie/{title} URI to an action called show of MovieController |
| 2 | Maps the /search URI to an action called search of MovieController |
| 3 | Maps the /graph URI to an action called graph of MovieController |
Of course, none of these controller actions are implemented yet. Let’s start with the first requirement.
5.2.1 The Find By Title Endpoint
The implement finding a Movie by title we’re first going to create a GORM Data Service called MovieService to encapsulate the data access logic and interaction with Neo4j.
You can do so with the grails CLI or via your favourite text editor or IDE by creating a class within the grails-app/services/neo4j/movies directory whose name ends with Service:
$ grails create-service neo4j.movies.MovieServiceMake the service abstract and add the @Service annotation to it to tell GORM that the service should be implemented automatically:
import grails.gorm.services.Service
import groovy.transform.CompileDynamic
import groovy.transform.CompileStatic

@SuppressWarnings(['UnusedVariable', 'SpaceAfterOpeningBrace', 'SpaceBeforeClosingBrace'])
@CompileStatic
@Service(Movie)
abstract class MovieService {
   ...
}
Now add an abstract method called find to the MovieService that takes the title as an argument:
@Join('cast')
abstract Movie find(String title)
The method will be automatically implemented for you by GORM, but note that we use the @Join annotation to indicate we want to fetch the cast association using the same query.
Now let’s implement the controller action that will invoke this method. First inject the service into the MovieController class:
MovieService movieServiceThis uses Spring to inject the dependency and make the service implementation available. Next add an action called show that invokes the find method and responds with the result:
def show(String title) {
    respond movieService.find(title)
}
If you now run the application and go to http://localhost:8080/movie/The%20Matrix%20Reloaded you will see a response as follows (shortened for brevity):
{
  "cast": [...],
  "id": 9,
  "released": 2003,
  "tagline": "Free your mind",
  "title": "The Matrix Reloaded"
}
If you wish to debug the Cypher query GORM executed then enable debug logging for the org.grails.datastore.gorm.neo4j package in grails-app/conf/logback.groovy
|
Although valid JSON, unfortunately this is not the exact format required to implement the Neo4j example application.
To customize the JSON create a grails-app/views/movie/_movie.gson JSON View and populate it with the following contents:
import groovy.transform.Field
import neo4j.movies.Movie

@Field Movie movie (1)

json {
    title movie.title (2)
    cast tmpl.cast( 'castMember', movie.cast ) (3)
}| 1 | Define the movie to be rendered in the model |
| 2 | Output the Movie title as JSON |
| 3 | Render another template for each member of the cast |
The call to tmpl.cast(..) requires the definition of a second template. The template namespace uses the method name to invoke a template of the same of name. So in this case we need to create a grails-app/views/movies/_cast.gson template.
import groovy.transform.Field
import neo4j.movies.CastMember

@Field CastMember castMember

json {
    job castMember.type.split("_")[0].toLowerCase()
    name castMember.from.name
    role castMember.roles
}
The _cast.gson template formats the CastMember relationship as JSON in the required format. Now if you run the application and visit the same URL as previously described, the resulting output is in the correct JSON format (shortened for brevity):
{
  "title": "The Matrix Reloaded",
  "cast": [
    {
      "job": "acted",
      "name": "Carrie-Anne Moss",
      "role": [
        "Trinity"
      ]
    },
    {
      "job": "acted",
      "name": "Keanu Reeves",
      "role": [
        "Neo"
      ]
    },
    ...
  ]
}
With the first endpoint done, let’s implement search!
5.2.2 The Search Endpoint
The search endpoint allows clients to search for movies by title, without knowing the exact title. To implement the persistence logic add a new method to MovieService that implements the search logic:
List<Movie> search(String q, int limit = 100) { (1)
    List<Movie> results
    if (q) {
        results = Movie.where {
            title ==~ "%${q}%"  (2)
        }.list(max:limit)
    }
    else {
        results = [] (3)
    }
    results
}| 1 | The search method takes a query parameter and a limit parameter for maximum results |
| 2 | A Where Query is used in combination with a like expression which GORM translates into a Cypher CONTAINS query |
| 3 | If no query is specified an empty list is returned |
When the query is executed the following Cypher is produced:
MATCH (n:Movie) WHERE ( n.title CONTAINS {1} ) RETURN n as data LIMIT {2}The {1} and {2} are named arguments which are populated by parameters, ensuring correct escaping and preventing injection attacks.
This example also demonstrates an important concept with GORM Data Services, in that you can mix abstract methods that are implemented automatically by GORM with custom logic.
|
Now let’s implement the controller action that will invoke this method:
def search(String q) {
    respond movieService.search(q)
}
Finally, the search endpoint returns the result in a different JSON format to the show endpoint. So we create a grails-app/views/movie/search.gson view to format the JSON result:
import groovy.transform.Field
import neo4j.movies.Movie

@Field Iterable<Movie> movieList = []

json(movieList) { Movie movie ->
        released movie.released
        tagline movie.tagline
        title movie.title
}
If you now go to the http://localhost:8080/search?q=Matrix URL the resulting JSON will look like:
[
  {
    "released": 1999,
    "tagline": "Welcome to the Real World",
    "title": "The Matrix"
  },
  {
    "released": 2003,
    "tagline": "Free your mind",
    "title": "The Matrix Reloaded"
  },
  {
    "released": 2003,
    "tagline": "Everything that has a beginning has an end",
    "title": "The Matrix Revolutions"
  }
]
5.2.3 The D3 Graph Endpoint
The final endpoint to implement is the graph endpoint. This endpoint outputs data about the graph in a JSON format that can be interpreted by the D3 JavaScript Library used by the example application’s UI.
The first step is to write a query for the data that we need. The nice thing about GORM for Neo4j is it has powerful integration with the Cypher query language.
To execute a Cypher query simply define an abstract method called findMovieTitlesAndCast that using the @Cypher annotation:
@Cypher("""MATCH ${Movie m}<-[:ACTED_IN]-${Person p}
           RETURN ${m.title} as movie, collect(${p.name}) as cast
           LIMIT $limit""")
protected abstract List<Map<String, Iterable<String>>> findMovieTitlesAndCast(int limit)
Using the @Cypher annotation GORM can automatically implement methods that execute Cypher queries for you. Notice how you can use class names and reference properties within the body of the query and these will be type checked ensuring the query is valid.
The next step is to convert the result of this query into a format expected by D3:
@ReadOnly
Map<String, Object> graph(int limit = 100) {
    toD3Format(findMovieTitlesAndCast(limit))
}

@SuppressWarnings('NestedForLoop')
@CompileDynamic
private static Map<String, Object> toD3Format(List<Map<String, Iterable<String>>> result) {
    List<Map<String,String>> nodes = []
    List<Map<String,Object>> rels= []
    int i = 0
    for (entry in result) {
        nodes << [title: entry.movie, label: 'movie']
        int target=i
        i++
        for (String name : (Iterable<String>) entry.cast) {
            def actor = [title: name, label: 'actor']
            int source = nodes.indexOf(actor)
            if (source == -1) {
                nodes << actor
                source = i++
            }
            rels << [source: source, target: target]
        }
    }
    [nodes: nodes, links: rels]
}
The graph method takes the Neo4j results and converts it to an appropriate format. Finally we can add a method to MovieController to return the required data:
def graph() {
    respond movieService.graph(params.int('limit', 100))
}
5.3 Add the Neo4j Movies UI
The final piece of the puzzle is to include the official Neo4j example application UI which is a simple HTML page.
The index.html page can be found in the complete/src/main/webapp directory of this tutorial, simply copy it into your application’s src/main/webapp directory.
Add the grails resources configuration pattern below to the grails-app/conf/application.yml file:
grails:
    resources:
        pattern: '/**'
Modify grails-app/controllers/neo4j/movies/UrlMappings.groovy to map the root of the application to this index.html file.
'/'(uri: '/index.html')With that done you are ready to run the application!
6 Running the Application
Before starting the application ensure the Neo4j server is running and that you have populated the Movies data as per the instructions in the Getting Started section.
To run the application use the ./gradlew bootRun command which will start the application on port 8080.
With the application running head over to http://localhost:8080 and you should see the UI of the application rendered correctly with a visualization of the graph:
